The purpose of this solution is to provide a direct reaction to user visits on your website. When a user visits e.g. a pricing page, you can automatically send them a message with more information on your offer or a special discount.
INSTRUCTIONS:
To begin, from the home screen, go to Automation Processes → Automation Rules → Add New Rule.
An automation rule editor will open.

[1] Settings
[2] A switch for turning the rule on and off.
[3] Save – after you finish editing this rule, save it by clicking this button.
[4] Categories – choose an element you want to add in the Automation Process field – events, conditions, actions. In each category, there can be more than one element.
After you click Settings, a window will appear.

[1] Name the rule.
[2] Assign the rule to a group by choosing from a drop-down list, or [3] add a new group.
[4] Sharing the rule means, that it will be visible on all user accounts and activated for all contacts in the system. This option is selected by default.
[5] The number of times this rule can activate for one contact.
[6] The minimal interval between rule activations for one contact.
Click Save changes to apply settings to the rule. The next step is adding an event.

[1] Click Add events.
[2] Click the green Plus icon. A list will open to the right. Find “Contact visited URL” on it.
[3] Click the chosen event. It will appear in the Automation Process field.
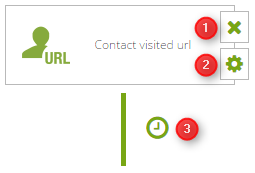
[1] Click this icon if you want to delete this element.
[2] Click this icon to open event details.
[3] Click this icon to open event settings.
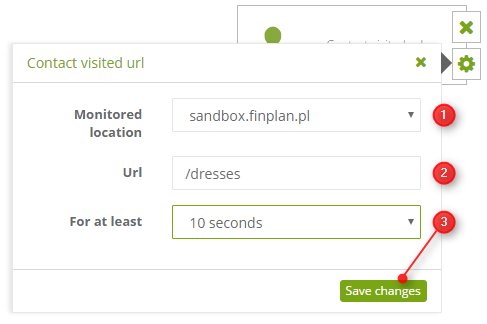
[1] Choose a website that will be monitored for the occurrence of this event.
[2] Provide the URL of the subpage you want to be monitored for the occurrence of this event. You can also use advanced URL patterns >>
[3] Decide how long must a contact stay on the subpage in order for the event to be triggered.
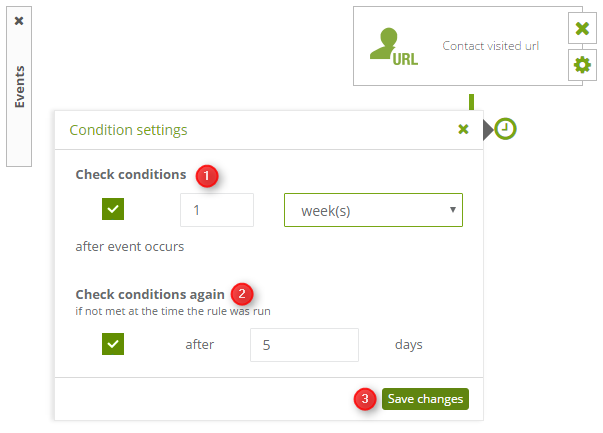
[1] Set the time period after which the system will check if the condition was met.
[2] Set the time period after which the system will check if the condition was met again (provided it was not met when the rule was activated)
[3] Click Save changes to apply settings.
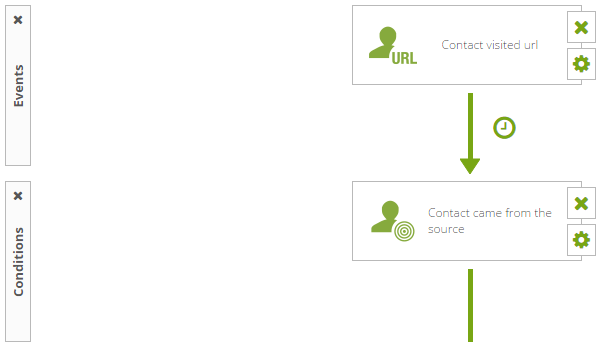
Now, add a condition. It will be automatically linked to the event. In the condition settings, provide the URL of the source you expect contacts to visit from.
Now, add an Action. The arrow will branch into [1] “If YES” and [2] “If NO” giving you the option to specify actions for different outcomes. Choose the action “Send an email to contact”.
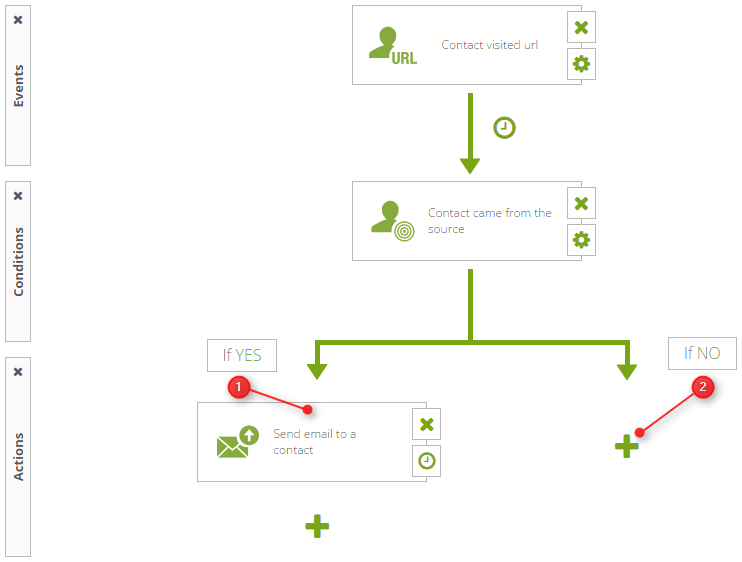
Proceed to this action’s settings.
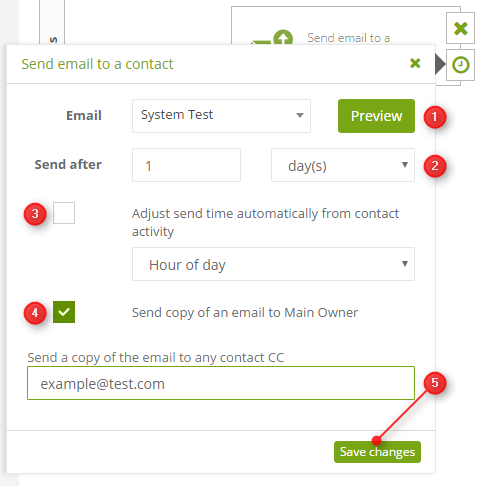
[1] Choose a message that you want to send with this action. You can see the message by clicking Preview.
[2] Choose a period of time after which the message is to be sent, starting from the moment conditions were met.
[3] Select the checkbox to automatically choose an optimal sending date and hour for active contacts, or choose from a drop-down list.
[4] Select the checkbox to automatically send a carbon copy of the message to the contact owner.
[5] In this field, you can put any email address you want to receive a carbon copy of the message.
Remember to save the rule and turn it on, otherwise, it will not work.